
Friday, November 28, 2014
Food Photography tips
It seems like everyone is taking photographs of the yummy food they are eating at restaurants. Or at thanksgiving a photo of that beautiful turkey could be in your camera. You may just want to take a quick photo and email or put it on facebook. But why not make it something truly lovely. It doesn't take that much time to do it justice. Of course the most important element is the light. Always remember, "no direct sunlight". Try to have the light at your back or directed toward the food. If at all possible use natural lighting. Flash makes everything flat. The samples I'm going to show you are of cake but you'll get the idea. No. 1 is natural light. No. 2 is room light.
Monday, November 24, 2014
Gift wrap with photos
Wrapping gifts with photos is a fun way to give a present a unique look. Are you sick of the old boring wrapping paper? Try this easy technique. Just wrap with plain brown wrapping paper, cheap, and add a digital image to the top. This could be anything from a photo of the person to some beautiful landscaper. Then use plain old string and maybe some twigs or herbs. Voila a lovely personalized package. Here are some samples.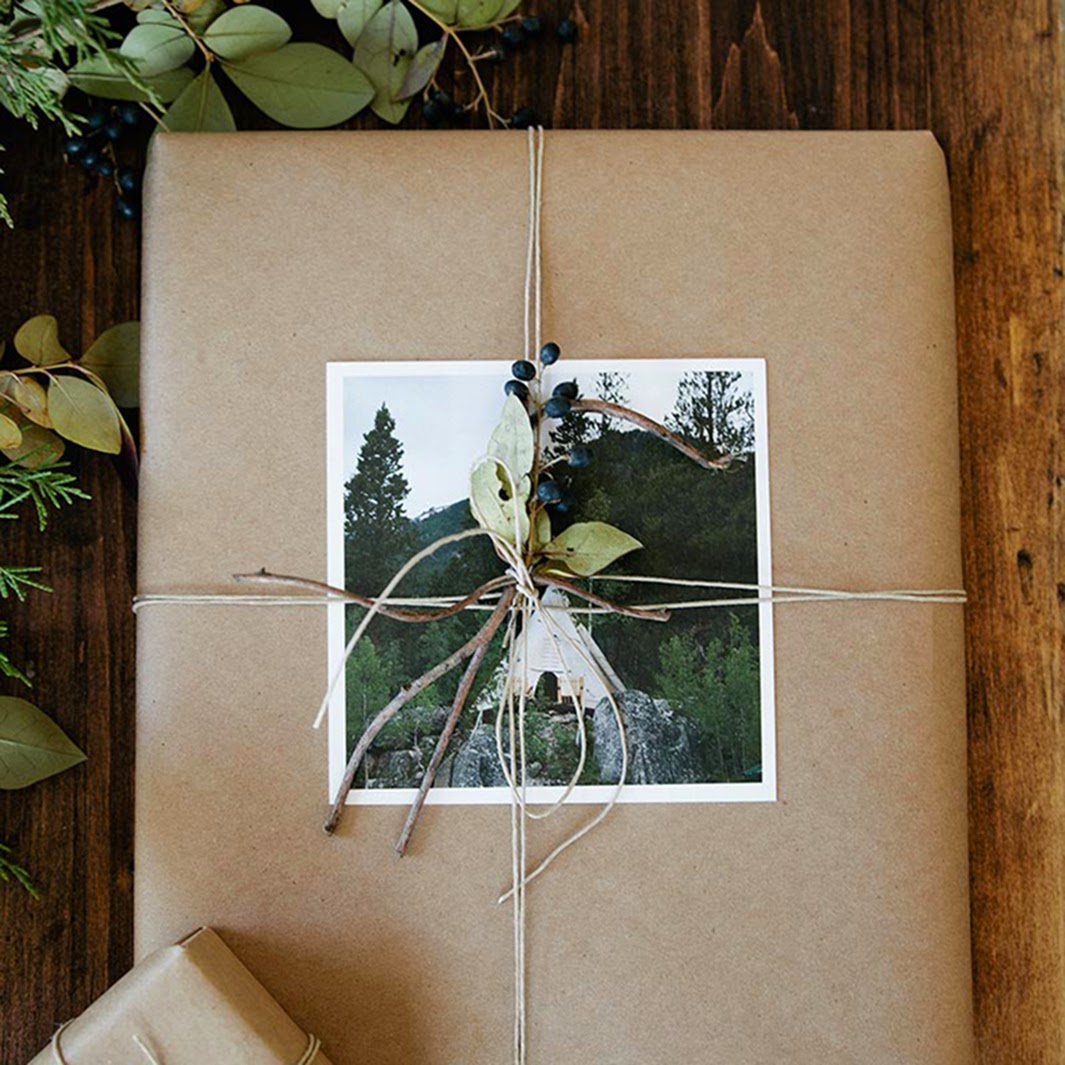

Thursday, November 20, 2014
Photos of strangers etiquette
Photos of strangers etiquette.
Usually we are taking photographs of people we know but when we are visiting exotic places there are many beautiful or unusual faces that we would like to record with our photographs. It is important to realize these people may not want their photograph taken. I always think of how I would feel if someone from, for instance, China was taking photos of my grandmother. This would feel invasive. And it would be. So keep that in mind. However there are places where you can pretty much take any photo you want. These are in markets. However it is still important to use the longest distance lens you have. Then you can stand way back and take that spontaneous photo. These are the best anyway. I try to move my camera around as though I am looking for something else. That way people don't feel they are the object. When I see that they have forgotten me, snap, I have a great photo. These photos of a Peruvian market are taken this way. My favorite is the pursed lips on the lady below. Look at those braids and the roses in her hat. What was her motivation of putting those roses there? Or the photo below that of the transaction. Looks like a 100 dollar bill that she is handing over. These are stories waiting to be told. That's photography, storytelling.


Friday, October 17, 2014
Photography without a tripod
Photography without a tripod:
1. Packing a tripod when you head off on holiday is a great way to extend the shooting day, allowing you to take some stunning night-time shots with streaking lights and illuminated landmarks. If you're pushed for space, though, check out this trick. Balance your camera somewhere sturdy and safe, disable the flash and set a slow shutter speed or two seconds or more. Now set your self timer, fire the shutter release and let go of your camera so that you won't cause it to wobble. By the time the self timer countdown expires, any residual movement caused by your hand letting go should have evened out, so your camera will sit still and steady throughout the exposure for a crisp, sharp result.
1. Packing a tripod when you head off on holiday is a great way to extend the shooting day, allowing you to take some stunning night-time shots with streaking lights and illuminated landmarks. If you're pushed for space, though, check out this trick. Balance your camera somewhere sturdy and safe, disable the flash and set a slow shutter speed or two seconds or more. Now set your self timer, fire the shutter release and let go of your camera so that you won't cause it to wobble. By the time the self timer countdown expires, any residual movement caused by your hand letting go should have evened out, so your camera will sit still and steady throughout the exposure for a crisp, sharp result.
2. It's not always possible to find a flat surface on which to perform the previous trick. Try and find a flat surface on some fence post and you'll see what we mean. Combat this by packing a small beanbag in your camera bag. Check out school sports and games categories on eBay to find little beanbags which can be pressed into shape on uneven surfaces, with your camera snugly settled on top. It's more stable and less likely to either fall over or wobble during the exposure.
3. Professional tripods use quarter-inch screws to fix your camera in place. You can easily source a screw of the same size from a normal hardware store. To avoid traveling with a bulky tripod, drill a hole in a standard bottle top (the type you'd find capping a drinks bottle) and thread the screw through it, fixing it in place using strong glue. Keep this in your camera bag as you travel, but don't bother carrying the rest of the bottle, as these are easily sourced wherever you happen to end up. Fill an empty bottle with grit to give it some weight and screw your cap to the top. Instant tripod.
Monday, September 22, 2014
Choosing a wedding photographer
Choosing a wedding photographer. Planning a wedding is exciting and sometime exhausting. There are so many decisions to make. However one of the most important is choosing your wedding photographer. This will be the single most important vendor you will hire. All those memories, beautiful decorations and flowers etc will only be in your memory unless you have the photographs to remind you.
Wedding photography is some of the most difficult photography to undertake. Your photographer is shooting in a wide variety of conditions: dark church or event center, outside in daylight or night lights, portraits, group photos, photos of flowers and decorations, dancing photographs, action shots like tossing a bouquet, to name just a few. And of course you want everything to look spontaneous. And you have never done this before so how do you choose your wedding photographer? Here are some things to keep in mind.
Wedding photography is some of the most difficult photography to undertake. Your photographer is shooting in a wide variety of conditions: dark church or event center, outside in daylight or night lights, portraits, group photos, photos of flowers and decorations, dancing photographs, action shots like tossing a bouquet, to name just a few. And of course you want everything to look spontaneous. And you have never done this before so how do you choose your wedding photographer? Here are some things to keep in mind.
- Do they have experience? Someone right out of a university may know to operate a camera but wedding photography is about dealing with people. The camera is the easy part.
- Are they mature and easy to talk to? A wedding photographer will be dealing with grandma and your cousins baby and everyone in between. They need to be able to connect with people and get them to follow instructions in a kind manner. They can't be pushy or abrupt.
- Are the curious about what you want? You want a photographer that listens to you and does not come in with a preconceived idea about how the photos should be taken. They can suggest but you are the one to determine the style.
- Do they have a pleasing personality? You will be spending the day with your photographer. You need to like them. Hiring a pre-madonna or a social introvert, male or female, can create a miserable experience.
- Will they meet with you before the wedding? I really suggest that you start with a phone call, followed by a personal visit. Texting and emails give you information. But you are dealing with a person. You need to talk to them and meet them.
- Do they have samples for you to look at? This may seem obvious but albums and photographs tell you a lot about the photographers style.
- Do their sample images have variety? This relates to the last question. Look at the group photos and the photos of the couple. Do they look natural and happy or stilted? Expression says a lot.
- How do they do their pricing? Many couples ask immediately "what will it cost?" Of course you want to know if you can afford the photographer but pricing has lots of variability. If the photographer has only set packages, beware. I always work with a couple to create what they actually need not what they "think" they want. Most pricing is about time: more time more cost. Unless you have a huge budget you do not need a professional photographer for hours and hours or the entire wedding start to finish. For instance your reception may be 4 - 5 hours long or more. Think about it: How many dancing shots do you want? Generally people want the following: getting ready photos, ceremony, portraits of couple and family, exiting or entering the church or reception, cutting the cake, toasts, the first dance. father/daughter, son/mother dance and party photos like bouquet toss. For most weddings the can all be done in 3 - 4 hours sometimes less. You don't need 100 photos of your friends dancing and drinking. A few will do.
If you use these guidelines for choosing your wedding photographer you will be well on your way to having wonderful photographic memories of you wedding. Give me a call if you would like to discuss this more. And look at the samples on this website under the "wedding" heading. Charlotte 512 447 2150
Friday, September 19, 2014
One Window light
Some of the most beautiful photographs use only one window light. Seems simple and in many ways it is. However you do need to train your eye to see correctly and understand the light source. Here are some samples.
This works so well when photographing women. You can almost feel the softness of their skin. There is an interplay between light, the angle of light, the type of light being used, and size of light. all combined with the pose, angle of pose and all things “posed”….
To begin place your subject close to the window and see how the light hits her skin. Make sure there are no sharp shadows. You want to place your subject in a window where there is no direct sunlight only diffused. Try it out. You'll love the results.
See samples of this technique on my blog. http://charlottebell.com/blog-page/
Saturday, September 13, 2014
Headshot photography tips
A professional head shot is necessary for every business. Some people say put your best "foot forward" I would say put your best "face forward". We have all seen a business card or website where the photo of the person a awful. I always wonder why that person thought a bad photo would increase people seeking their product or services. So here are some headshot photography tips. By the way you can do this yourself with a friend. First, wear clothing you generally would wear to work. Then...
1. LIGHTING: The most important element. I would suggest you take the photo outside. Find a place where your face is in the shade but the sun is at the photographers back. You want your face properly lit.
2. BACKGROUND: Use a simple background. This could be poster board or a stone wall. Remember this is just your head from the top of the shoulders up. Do not stand too close to the back ground.
3. POSITION: Stand your body at a 45 degree angle to the camera. Then rotate your face toward the camera. Make sure your shoulders are back. No slouching.
4. HEIGHT: Have your friend stand a little above where you are. This is especially helpful if you have a double thick chin.
5. NUMBER: Take lots of photos. Have fun. Don't hold a smile. Keep it spontaneous. Try some with smiles some without a smile. Think pleasant thoughts. It shows on your face.
After you take 20 or 30 shots look at them and learn. You can then do it again. You may find that there is a particular expression you like. Try to repeat this look the second time around. Now you have a photo you can be proud of to place on your website, facebook, linkedin or business cards.
Subscribe to:
Posts (Atom)